Making Your First Guitar
A Tutorial
The Body
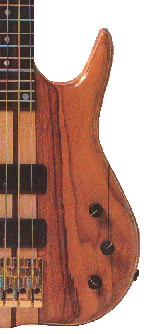
With the bolt-on neck and the thru-neck design, the big difference is simply that the bolt-on is one piece, while the thru-neck has two wings which attach to the portion of the neck which runs through the body.
Trace out the contours of the body or wings onto the stock you intend to use for the body and cut the sample out. This is probably best done with a band saw with a coarse quarter inch blade. Alternatively, it can be done with a jig saw, or even manually with a bow saw. The body does not have to be cut out in one continuous action, but parts can be cut away a bit at a time, making room in which to move the blade for subsequent cuts.
Once the body is cut out, the saw marks can be removed from the wood by using a disc sander. This can be a "stand alone" unit dedicated to sanding or a sanding disc which can be mounted on a table saw. Alternatively, a portable belt sander and even hand sanding (for those with patience and energy) will get the job done. With the thru-neck bass, the wings can now be attached. In order to strengthen the joint, I prefer to use dowels or biscuits along with glue. This also aids in aligning the wings to the neck and keeps them from slipping when glued and clamped.
If you save the scrap from cutting out the wings, you can use them as cauls to clamp the wings to the neck without slipping. White or yellow aliphatic carpenters glue is fine for these joints. If using some species of exotic woods which are oily or resinous, wipe the areas to be glued with acetone in order to remove these substances which may weaken the joint. Epoxy could also be used here, but it is a bit more messy to deal with. Sand the glue joints flat once the glue has dried.